
 Business License

Underfloor Heating Installation: A Complete Technical Guide for Contractors and Engineers
Marcus Chen thought he had accounted for everything. The hydronic underfloor heating system for his client's 400 m² commercial renovation was spec'd, the manifold was ordered, and the tubing was ready to unroll. Then his installer ran the first heat-loss calculation without factoring in subfloor insulation. The result? The system would need to run 23% longer to maintain target temperatures, and the client's energy bills would spike every winter.
This scenario plays out more often than most contractors admit. Underfloor heating installation isn't just about laying pipes or cables beneath the floor. It's about creating a complete thermal system where insulation, substrate preparation, and heating elements work together. Get one layer wrong, and you compromise efficiency, comfort, and system longevity.
In this guide, we'll walk through the complete underfloor heating installation process, from subfloor preparation and insulation board selection to tubing layout and final floor covering. You'll learn how to avoid the mistakes that cost projects thousands in rework, and how the right insulation materials can improve system efficiency by 30% or more.
Why Subfloor Insulation Is the Foundation of Every Underfloor Heating Installation
Underfloor heating systems work by radiating heat upward through the floor surface. Without proper subfloor insulation, a significant portion of that heat travels downward into the concrete slab or soil beneath the building. Industry data from the International Energy Agency shows that uninsulated floors can account for 10–20% of total building heat loss in temperate climates.
The Physics of Downward Heat Loss
Heat follows the path of least resistance. In an underfloor heating installation, that means thermal energy moves in every direction, not just upward toward the occupied space. A concrete subfloor has thermal conductivity around 1.7 W/(m·K), which is roughly 50 times higher than rigid XPS insulation board at 0.030–0.038 W/(m·K). Without an insulation barrier, your heating system is effectively warming the ground.
For hydronic systems circulating water at 45°C, this translates to real losses. A poorly insulated installation might lose 25–35 W/m² downward. With proper subfloor insulation, that figure drops to 8–12 W/m². Over a heating season, the difference is measurable in both energy cost and carbon emissions.
Choosing the Right Insulation Board for Underfloor Heating
Not all insulation materials suit underfloor heating applications. The board must withstand compressive loads from the screed or finished floor above, resist moisture from the substrate below, and maintain dimensional stability across temperature cycles.
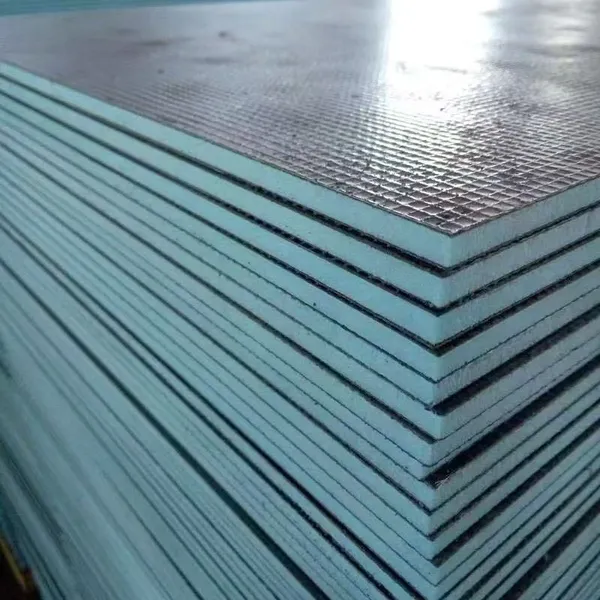
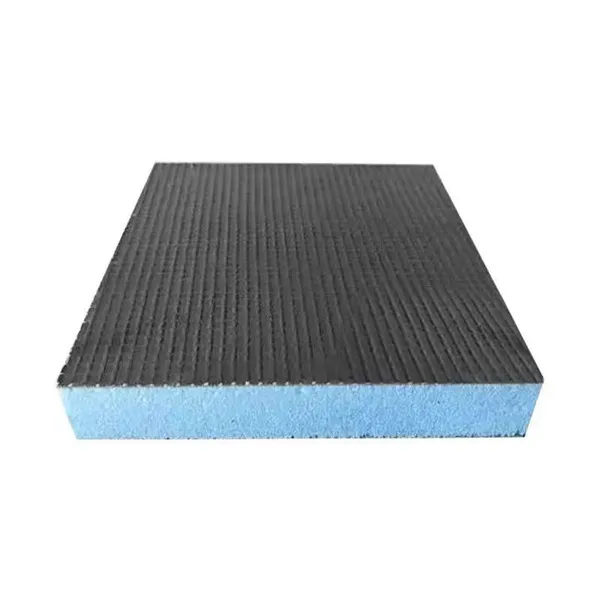
XPS extruded polystyrene boards are the industry standard for subfloor insulation in underfloor heating systems. Their closed-cell structure delivers:
Thermal conductivity: 0.030–0.038 W/(m·K) for excellent thermal resistance
Compressive strength: 150–700 kPa depending on grade, sufficient for residential and commercial screed loads
Water resistance: Closed-cell structure resists moisture absorption better than open-cell alternatives
Dimensional stability: Maintains shape across the temperature range of underfloor heating cycles
At DaCheng BangMei, our XPS insulation boards are manufactured with compressive strengths starting at 250 kPa, making them suitable for standard screed applications up to 65 mm thickness. For heavy commercial loads or thicker screeds, our 500 kPa and 700 kPa grades provide additional structural support without compression.
Want to see which XPS grade suits your project? Explore our XPS insulation board specifications and compressive strength options.
Edge and Perimeter Insulation Requirements
Heat doesn't just escape downward. Thermal bridging at the perimeter of the heated zone allows heat to flow laterally into unheated areas and external walls. Building codes in most markets now require edge insulation strips installed where the heated screed meets vertical surfaces.
Rock wool edge insulation strips serve this function effectively. Our Yalong rock wool boards, with densities of 60–100 kg/m³, can be cut into perimeter strips that:
Provide thermal break at slab edges
Absorb expansion movement of the heated screed
Deliver non-combustible fire performance (A1 rating) where code requires it
Install quickly before screed pouring
For projects where building codes mandate non-combustible materials throughout, our A1-rated rock wool insulation boards offer a code-compliant edge insulation solution.
Electric vs. Hydronic Underfloor Heating: Installation Implications
The type of underfloor heating system you install determines much of the preparation, insulation strategy, and construction sequence. Both systems benefit from subfloor insulation, but the installation details differ significantly.
Electric Underfloor Heating Installation
Electric systems use heating cables or mats installed directly beneath the floor finish or embedded in a thin screed. They are typically used for smaller areas, retrofit applications, or supplemental heating.
Installation sequence:
Prepare and clean the structural subfloor
Install XPS insulation boards (minimum 20 mm, 30 mm recommended)
Lay a vapor barrier or separation membrane if required by local code
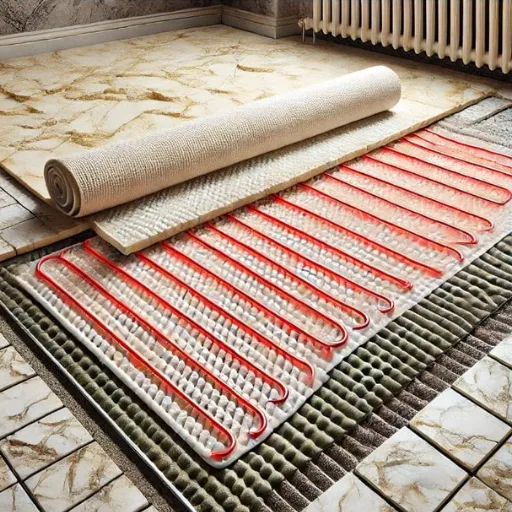
Install heating mats or cables according to manufacturer spacing guidelines
Embed in a thin self-leveling compound or tile adhesive (typically 3–10 mm)
Install floor finish directly over the heating element
Electric systems heat up faster than hydronic systems but have higher operating costs per kWh in most markets. The thin buildup height makes them ideal for retrofits where floor height cannot increase significantly.
Hydronic Underfloor Heating Installation
Hydronic systems circulate warm water through plastic tubing (typically PE-RT or PEX-a) embedded in a screed layer. They are the preferred choice for whole-building heating and larger commercial applications.
Installation sequence:
Prepare structural subfloor with leveling compound if needed
Install XPS insulation boards (minimum 30 mm, 50–100 mm for ground floors)
Lay a vapor barrier membrane above the insulation
Install edge insulation strips around the perimeter
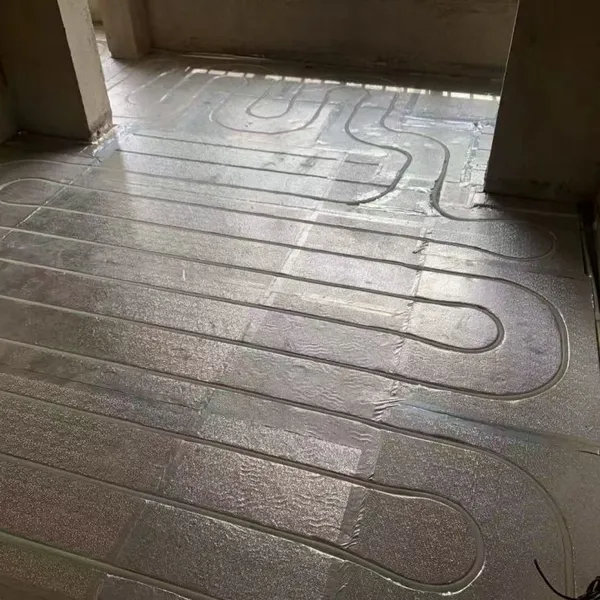
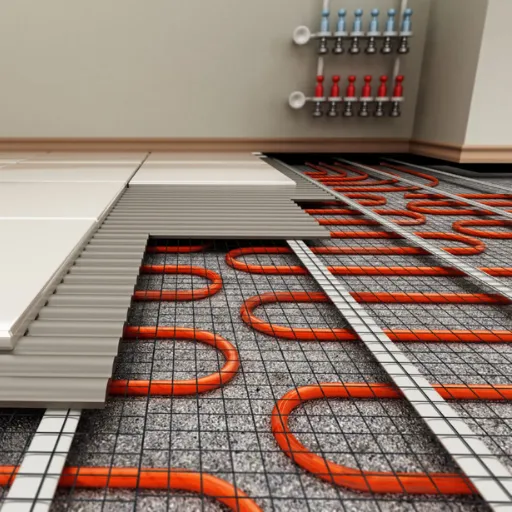
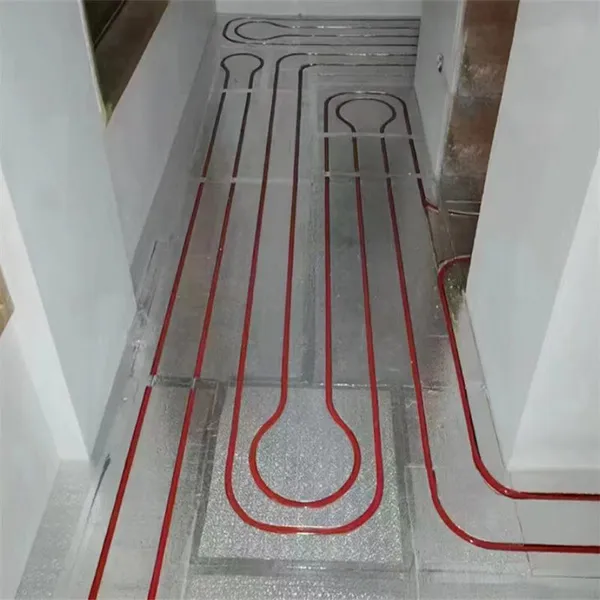
Lay the pipework in specified loops with fixing clips or rails
Pressure-test the pipework before screed installation
Pour screed (typically 65–75 mm over the pipes)
Allow screed curing time (typically 21 days for cement screed) before operating the system
Hydronic systems offer lower operating costs when connected to efficient heat sources like heat pumps or condensing boilers. The greater thermal mass of the screed provides more stable temperatures but slower response times.
Step-by-Step Underfloor Heating Installation Process
Whether you're installing electric or hydronic underfloor heating, following a methodical process prevents the errors that lead to cold spots, system inefficiency, or floor damage.
Step 1: Subfloor Assessment and Preparation
The structural subfloor must be clean, level, and structurally sound before any insulation goes down. Common preparation requirements include:
Level tolerance: Maximum 3 mm deviation over 2 meters for direct-lay systems; 5 mm acceptable for screed systems
Surface cleanliness: Remove all debris, dust, and loose material that could create voids under insulation boards
Moisture testing: Concrete subfloors must reach acceptable moisture content before covering, typically <75% RH for polymer-modified screeds
Structural integrity: Repair cracks or defects that could transmit through the finished floor
When Elena Rodriguez's installation team in Barcelona skipped the moisture test on a ground-floor slab, they trapped excess moisture beneath the XPS insulation. Six months later, efflorescence appeared at the tile joints, and the adhesive bond failed in several areas. The remediation cost exceeded €8,000, far more than the 30-minute moisture test would have cost.
Step 2: Laying the Insulation Board System
Insulation boards should cover the entire heated area with minimal gaps. Installation best practices include:
Staggered joints: Lay boards in a brick-bond pattern so joints don't align continuously across the floor
Tight butting: Push boards firmly together; gaps create thermal bridges
Cutting around penetrations: Use a fine-tooth saw for clean cuts around pipes, columns, and conduits
Multiple layers: For thick insulation requirements, stagger joints between layers to minimize thermal bridging
For ground-floor installations or installations over unheated basements, building codes typically require 50–100 mm of XPS insulation. Suspended floors and upper levels may require 20–30 mm depending on climate zone and energy code.
Step 3: Installing the Heating Elements
For electric systems:
Roll out heating mats with the cable side down
Maintain specified spacing between cable runs (typically 50–200 mm depending on heat output requirements)
Never overlap cables or cross one cable over another
Install a floor sensor in a conduit between two cable runs for thermostat control
Test resistance with a multimeter before, during, and after installation
For hydronic systems:
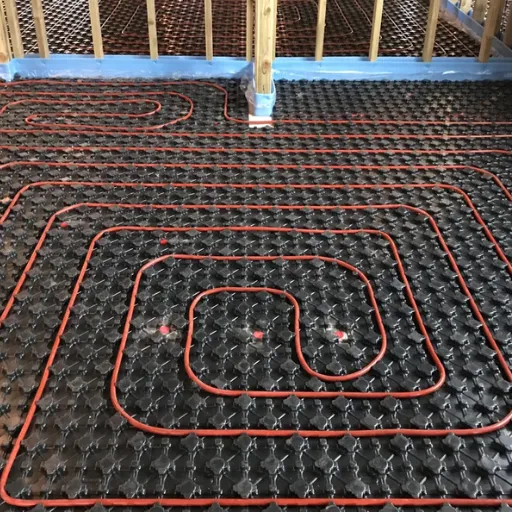
Install pipework in specified loop patterns: serpentine for large even areas, counter-flow spiral for improved temperature uniformity
Maintain designed pipe spacing (typically 100–300 mm depending on heat load and floor covering)
Secure pipes to insulation boards with clip rails or stapling systems
Ensure minimum bending radii are maintained to avoid kinking
Conduct pressure test at 6 bar for 24 hours before screed placement
Step 4: Screed and Floor Covering Installation
The screed serves as both the heat distribution layer and the structural base for the floor finish.
Critical considerations:
Use a screed mix compatible with underfloor heating (typically fiber-reinforced or polymer-modified)
Ensure the screed fully encapsulates the pipes with minimum 30 mm cover above the top of the pipe
Install movement joints as specified by the screed manufacturer
Do not operate the heating system until the screed has cured sufficiently, typically 21 days for standard cement screed
When first commissioning, increase water temperature gradually (5°C per day) to avoid thermal shock to the screed
Ready to specify insulation for your underfloor heating project? Request a custom quote for XPS and rock wool insulation boards tailored to your floor assembly requirements.
Common Underfloor Heating Installation Mistakes and How to Avoid Them
Even experienced contractors make errors that compromise system performance. Here are the most costly mistakes and how to prevent them.
Mistake 1: Inadequate or Missing Subfloor Insulation
The most common and most expensive error is treating subfloor insulation as optional. Some contractors skip it to save material cost, not realizing that the building owner pays for that decision every heating season for the life of the building.
Prevention: Specify insulation board thickness based on heat loss calculations, not guesswork. For ground floors, never install less than 30 mm XPS; 50–80 mm is standard in cold climates.
Mistake 2: Thermal Bridging at Structural Penetrations
Steel columns, service penetrations, and foundation walls create thermal bridges that bypass the insulation layer. These localized cold spots can cause condensation and mold growth.
Prevention: Cut insulation boards carefully around penetrations and seal gaps with compatible expanding foam. Maintain continuity of the insulation layer wherever structurally possible.
Mistake 3: Incorrect Screed Curing Before Commissioning
Impatience costs money. Operating a underfloor heating system before the screed has cured causes cracking, reduced strength, and potential delamination from the subfloor.
Prevention: Follow screed manufacturer curing guidelines strictly. For cementitious screeds, 21 days is standard. Use temporary heating if the building must be occupied sooner, but keep it separate from the underfloor system.
Mistake 4: Incompatible Floor Coverings
Some floor coverings act as thermal barriers that reduce system efficiency. Thick carpets with underlay can increase the floor's thermal resistance to the point where heat output is insufficient for the space.
Prevention: Verify floor covering thermal resistance (R-value) against system design output. Tile, stone, and engineered wood are typically compatible. If carpet is required, specify low-tog underlay and consult the heating system designer.
Insulation Specifications for Different Underfloor Heating Applications
The optimal insulation specification varies by building type, climate, and floor construction. Use the following guidelines as a starting point, and confirm with local energy code requirements.
Residential Ground Floors
| Parameter | Specification |
|---|---|
| Insulation type | XPS extruded polystyrene board |
| Minimum thickness | 50 mm (cold climates: 80–100 mm) |
| Compressive strength | ≥250 kPa |
| Thermal conductivity | ≤0.036 W/(m·K) |
| Edge insulation | 10 mm rock wool strip or XPS perimeter board |
Residential Upper Floors Over Unheated Spaces
| Parameter | Specification |
|---|---|
| Insulation type | XPS or high-density EPS board |
| Minimum thickness | 30 mm |
| Compressive strength | ≥200 kPa |
| Additional requirement | Acoustic isolation layer if required by code |
Commercial Applications
| Parameter | Specification |
|---|---|
| Insulation type | XPS board (high compressive grade) |
| Minimum thickness | 50–80 mm depending on load and climate |
| Compressive strength | ≥500 kPa for heavy traffic areas |
| Edge insulation | Full-height rock wool strip to accommodate thicker screed |
For mixed-use buildings where fire ratings apply to floor assemblies, our non-combustible rock wool insulation solutions integrate with standard underfloor heating construction while maintaining code-compliant fire performance.
Building Codes and Standards for Underfloor Heating Installation
Underfloor heating installation must comply with multiple overlapping standards: energy efficiency codes, fire safety regulations, and mechanical system standards.
Energy Efficiency Requirements
Most jurisdictions now mandate maximum U-values (thermal transmittance) for ground floors and floors over unheated spaces. The insulation layer in your underfloor heating assembly is what enables compliance with these U-value limits.
For example, under the EU Energy Performance of Buildings Directive, new residential ground floors in many climate zones must achieve U-values of 0.30 W/(m²·K) or lower. Achieving this with a heated screed assembly typically requires 60–100 mm of XPS insulation depending on the full build-up.
Fire Safety and Insulation Materials
When underfloor heating is installed in multi-story buildings, the insulation materials may contribute to the fire resistance rating of the floor assembly. Rock wool insulation contributes non-combustible performance and can form part of a fire-rated floor system when specified correctly.
XPS extruded polystyrene, while excellent thermally, is combustible and must be separated from occupied spaces by appropriate screed or fire barriers according to local code. Always verify fire compartmentation requirements with the project fire engineer.
Commissioning and Long-Term Performance
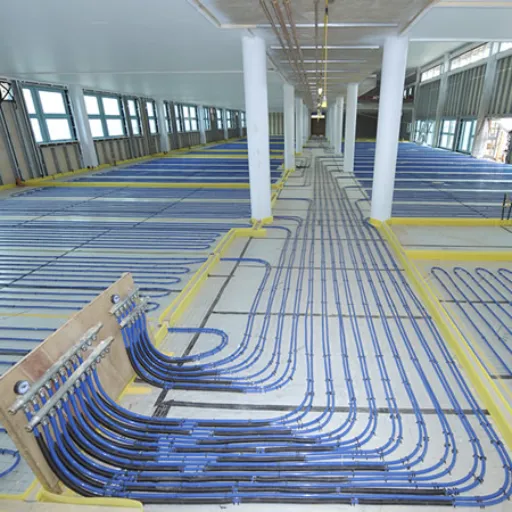
Proper commissioning ensures the underfloor heating system operates at design efficiency. The insulation layer you installed during construction continues to influence performance for decades.
Commissioning Checklist
Verify all zones heat evenly with an infrared camera
Record flow temperatures and pressure drops at the manifold
Set the heating curve on the mixing valve or heat pump controller
Program thermostats with appropriate setback temperatures
Provide the building owner with operating instructions
Insulation Durability Over Time
Quality XPS insulation maintains its thermal performance for the life of the building. Unlike some open-cell materials, XPS does not absorb moisture and does not settle or degrade under normal compressive loads. Our XPS boards are manufactured with a minimum compressive strength of 250 kPa and closed-cell structure that resists long-term moisture exposure.
However, insulation performance depends on correct installation. Boards that were poorly butted during installation, or gaps that were left around penetrations, create permanent thermal bypasses that no amount of commissioning can fix. This is why installation quality matters as much as product specification.
Conclusion
Underfloor heating installation is a system, not a product. The heating element, whether electric cable or water-filled pipe, is only one component. Without proper subfloor insulation, edge insulation, and correct installation sequence, even the most expensive heating system underperforms.
Key takeaways for your next project:
Never skip subfloor insulation. XPS boards with appropriate compressive strength are the industry standard for a reason, they work.
Size insulation thickness to local energy code and heat loss calculations, not guesswork.
Follow screed curing times before commissioning to avoid costly cracks and repairs.
Verify floor covering compatibility early in the design phase.
Use non-combustible edge insulation where fire codes require it.
When James Okonkwo's team installed a hydronic underfloor heating system for a hotel project in Lagos, they specified 50 mm XPS insulation beneath the screed and paid careful attention to board joint alignment. The result? The system reached design output at flow temperatures 4°C lower than an identical system installed by another contractor in the same development who had cut insulation costs. Over a 15-year building lifecycle, that difference in operating efficiency pays for the insulation many times over.
If you're planning an underfloor heating installation and need guidance on insulation specification, compressive strength requirements, or fire-rated edge insulation, our technical team provides complimentary consultation for your project. We can review your floor assembly drawings, recommend the optimal XPS board grade, and ensure your insulation specification aligns with local energy codes.
Request a Custom Quote for Your Underfloor Heating Insulation
DaCheng BangMei, operating under Huaneng Zhongtian Energy-Saving Technology Group, manufactures XPS extruded polystyrene boards, rock wool insulation, rubber-plastic insulation, and nano aerogel products from our 225,000 m² facility in Dacheng County, Hebei. With 40+ years of manufacturing heritage and export experience across 35+ countries, we supply certified thermal insulation materials for construction, HVAC, and industrial applications worldwide.
Recently Posted
-
Insulation for Metal Buildings: Complete Buyer's Guide 2026
June 24, 2026A warehouse manager in Texas watched his electricity bill climb every summer. The metal roof turned the building into a solar oven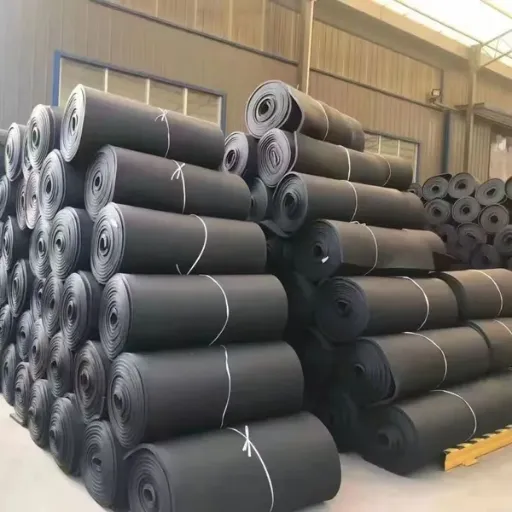 Read More
 -
Insulation Materials Comparison: How to Select the Right Type for Your Project
June 24, 2026The procurement manager stared at six quotations on her screen. Each supplier recommended a different insulation material for the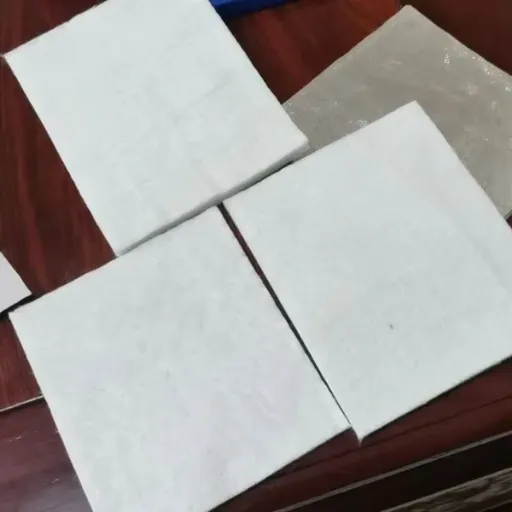 Read More
 -
Thermal Conductivity of Insulation Materials: A Specifier's Guide
June 24, 2026Ahmed Hassan spent three weeks reconciling quotes for a cold storage expansion in Dubai. One supplier quoted 80 mm rubber-plastic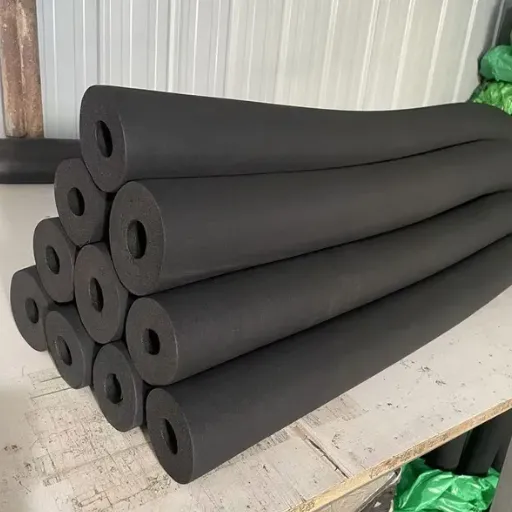 Read More
 -
Basement Insulation Board: Complete Buyer's Guide | DaCheng BangMei
June 24, 2026A homeowner in Michigan finished their basement with standard fiberglass batts and drywall. Two winters later, the bottom plates w Read More

Contact Us
Recommended Products
-
 Eco-Friendly Aluminum Foil Foam Board for Underfloor Heating SolutionsNegotiableMOQ: 100 Pieces
 -
Rubber Plastic Insulation Board Waterproof for Industrial Thermal InsulationNegotiableMOQ: 500 Square Meters
-
Premium Soft Silica Nano Aerogel Felt Sheets for Industrial Heat InsulationNegotiableMOQ: 50 Meters
-
Customizable PVC Magnetic Door Curtain Roll for Home & Kitchen UseNegotiableMOQ: 500 Kilograms
-
XPS Waterproof Board for Underground Garage Moisture BarrierNegotiableMOQ: 50 Square Meters
-
Heavy Duty Titanium Steel Mesh Magnetic Door Curtain With Reinforced EdgesNegotiableMOQ: 10 Pieces
-
Rubber Plastic Insulation Tube for Refrigeration & Cold Storage PipelineNegotiableMOQ: 500 Square Meters
-
Durable Aluminum Dry Floor Heating Panel With High Thermal ConductivityNegotiableMOQ: 100 Pieces
-
Nano Aerogel Felt Insulation Material for Cold Protection and Energy EfficiencyNegotiableMOQ: 50 Meters
-
High-Temperature Nano Silica Aerogel Felt for Pipe Fire and Thermal InsulationNegotiableMOQ: 50 Meters
-
Insulated PVC Magnetic Door Curtain for Thermal Insulation in Bedroom & KitchenNegotiableMOQ: 500 Kilograms
-
Professional Aluminum Foil Foam Board for Dry Underfloor Heating SystemsNegotiableMOQ: 100 Pieces
-
Aluminum Underfloor Heating Module for Commercial and Residential UseNegotiableMOQ: 100 Pieces
-
XPS Waterproof Board 10mm Thickness for Roofing InsulationNegotiableMOQ: 50 Square Meters
-
Custom Size Titanium Steel Mesh Magnetic Door Curtain for Warehouse Pest ControlNegotiableMOQ: 10 Pieces
-
Flame Retardant Thermal Insulation Sponge for Rubber & Plastic Pipes - Fireproof Factory DirectNegotiableMOQ: 500 Square Meters
-
Cold Insulation Rubber Plastic Board for HVAC and Industrial Pipeline ApplicationsNegotiableMOQ: 500 Square Meters
-
20mm XPS Thermal Insulation Panel for Dry Underfloor Heating SystemsNegotiableMOQ: 100 Pieces
-
High Temperature Resistant Foam Insulation Tube for Air Conditioner DuctsNegotiableMOQ: 500 Meters
-
XPS Tile Backer Board Waterproof Insulation for Wall & BathroomNegotiableMOQ: 500 Square Meters